How To Install Fonts
INSTALLING FONTS IN WINDOWS
- Click on the Start button and select Settings > Control Panel (or open My Computer and then Control Panel).
- Double-click the Fonts folder.
- Select File > Install New Font.
- Locate the directory or folder with the font(s) you want to install. Use the Folders: and Drives: windows to move to the folder on your hard drive, a disk, or CD where your new TrueType or OpenType fonts are located.
- Find the font(s) you want to install. TrueType fonts have the extension.TTF and an icon that is a dog-eared page with two overlapping Ts. They require only this one file for installation and use. OpenType fonts have the extension.TTF or .OTF and a little icon with an O. They also require only this one file for installation and use.
- Highlight the TrueType or OpenType font to install from the list of fonts window.
- Click OK to complete the TrueType or OpenType font installation.
INSTALLING FONTS ON MAC 0S X
To install a font on Mac OS X, download it in OpenType (.otf), TrueType (.ttf), Datafork TrueType Suitcase (.dfont), or an older type of font file Macs supports, like PostScript Type 1.
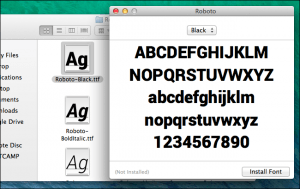
- Double-click the downloaded font file to preview it.
- Click Install Font in the preview window to install it.

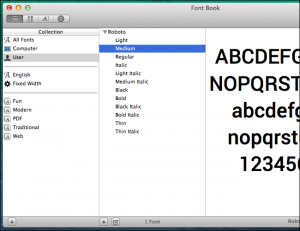
3. Preview a font by clicking it.
To install multiple font files at once, drag and drop them onto the Font Book window.

Author: Debbie Kurth
Debbie is an former Walt Disney Imagineer, Equestrian, Technical Producer and the CEO of Multimedia Designs, a digital design and engineering firm in Los Angeles, CA.


